
One Sunday morning you wake up and during breakfast while reading the paper you spot in the classifieds some local garage sales. There is not much going on so you decide to take a ride and check one out. Who knows maybe there is a Rembrandt hiding behind a velvet Elvis or something. Upon arrival under a makeshift table of two sawhorses and some leftover plywood you spot what looks like a guitar case. As your interest arises upon closer inspection you notice it is a smaller medium brown colored case. Palms start to sweat and your pulse quickens- could it be an old Les Paul or something? You ask the homeowner if there is a guitar in that brown case under the makeshift table and he says “yes it was given to me by my father but I don’t play it any more, first $75 takes it”. You ask to see it and zoning in you see the small tarnished Gibson logo near the handle. Now things are really starting to get interesting to say the least. While holding your breath and what seems like 10 minutes you open the case only to see what remains of a completely stripped 1959 Gibson Les Paul with a few missing appointments, falling off binding, next to nothing frets and what appears to be an old headstock repair that looks like it was performed by the late-great Ray Charles (sorry Ray…). You get that feeling like when you are on an airline flight and it just suddenly dropped a couple thousand feet. Well despite all its flaws, breaks and bruises it is still a 1959 Gibson Les Paul. So you quickly hand over $75.00 (and that’s cash my friend) and head for home…. quickly. What to do now with your impulsive garage sale score. It is too far gone to be worth top dollar but not so far gone that it cannot be fixed. What to do, what to do. Who can take a semi-basket case like this and return it to its vintage glory, correctly?
Enter a Canadian fellow with the skill, craftsmanship and knowledge to make this happen. His name is Gord Miller of GM Vintage Restorations. Gords’ work is very well known among collectors of vintage guitars. His work is not great, not fantastic, not excellent. It goes beyond and is as close to original as you can possibly get.
In this very detailed Spotlight segment Gord talks about all different facets of guitar restoration including woodworking, lacquer finishing, his proprietary aging process and his exclusive distributorship of Montreaux parts. If you have a vintage guitar and want any part of it restored correctly send it straight to the great white north and let Gord do his restoration magic on it. You will be very happy you did.
300guitars: Hi there Gord. Please tell us a little bit about yourself. Where you were born and raised and how you got into guitars?
Gord Miller: I was born and spent my first 14 years in Surrey (on the outskirts of Vancouver), British Columbia. My earliest musical memory is getting the Beatles Abbey Road album and Which way are you going, Billy? by the Poppy Family for Christmas.. I think it was 1970 so I would have been ten. I was enrolled in guitar lessons around this time…my mom’s idea (I wanted to play drums) My first guitar was a Hagstrom one pickup solid body in a ghastly bright orange color.
When I was fourteen, my family moved to Winnipeg and I discovered hard rock. I remember Alice Cooper was my first favourite, and I have a distinct memory of learning “I’m Eighteen” on my parent’s record player. I must have been showing some promise by that point as my parents shelled out the money for a late 60’s SG Custom, which was my first good guitar. We had a little band…we’d put on Alice Cooper makeup, jump around and play Eighteen and School’s Out over and over….good times! That same year the first Kiss album came out and it was game over….all my allowance was spent on makeup and platform shoes!
A couple of years later my family relocated to Oakville, which is on the outskirts of Toronto, Ontario. I was always drawn towards the harder rock crowd and my school was into Supertramp, so me and my pals were outcasts. I remember our band being invited to play at a school coffee house in January. Everybody else had acoustic guitars and we showed up in full Kiss regalia with blood and flashpots. We caused quite a stir until it was discovered that our drummer had gotten locked outside the school in subzero temperatures. We eventually found him and played to a rather stunned audience of students and teachers…neither of which ever invited us back.
After graduating high school I briefly got a job in a steel mill in Hamilton, Ontario. This is when I met my good friend Colin Cripps. Colin was working as a repairman at Reggie’s music in Hamilton, which was right opposite the bus terminal in downtown Hamilton. He was the first guy I knew who was into old guitars. The day I met him he was taking an all gold 50s Les Paul and a Prewar Gibson J200 to show Paul Stanley of Kiss. The guitars didn’t do much for me but I was pretty impressed that he was meeting Kiss!
Around 1980 I started playing full time on the Ontario bar circuit in a new wave/ classic rock band with my then girlfriend. The other guitar player in the band was a bit older than me and knew about the merits of old Gibson’s and Fender’s. Between him and Colin I began to pick up a little bit of knowledge and appreciation for the old stuff, but by and large pointy headstocks still ruled as far as I was concerned.
I played around Toronto until about 1983, when I decided to relocate back to British Columbia. Time marched on and I did a number of uninspiring retail management jobs while playing in the evenings. In 1993 I met my wife Deborah in Kelowna in the interior of B.C., a year later we decided to move to Vancouver Island and we opened a vintage/ used guitar store. We had the store for about 6 years and during that time I learned a ton about old guitars.
300guitars: When you were young did you take apart all your guitars to see what made them tick and how they went together?
Gord Miller: I don’t really remember ripping guitars apart that much. I was always more into the presentation of things. I do have a clear memory of removing the pickup covers from my SG Custom because someone told me that was a cool thing to do. I also remember being disappointed because the exposed coils were black…and Ace Frehley’s were white! So of course I had to do the cool thing and paint them!
I can also remember being about sixteen and ripping the tolex off a perfectly good Marshall stack and recovering it in white, because that’s what the local Toronto rock gods Triumph had done. I guess these are early indications of my future career path!
300guitars: How did you get started doing restoration work? What inspired you?
Gord Miller: While I was up in Kelowna, I met a likeable rouge by the name of Jack O’Connor. Jack was totally into Teles (thought Strats and LPs were crap) and by the time I met him he was already doing aged paint jobs on Teles, well before Fender launched the relic concept. We would get together on Saturdays in Jack’s garage and the BS would fly fast and furious! Guitars were cheap then (I remember buying a 1960 Jazzmaster with tweed case for under $100.00) so we would practice on these future classics. This was my first real exposure to the idea of “restoration”.
One good thing about having a music store back in the mid 90s was that most people preferred new guitars over old ones and a LOT of cool stuff walked through the door on trade-in. I remember getting a stripped 1961 Strat as partial trade for an Ovation acoustic guitar. I knew the Strat could be sold for more with a paint job on it. I already had a good compressor and paint gun (I had previously painted two 1955 Chevy Belair’s) so I decided to do an “out the back door” refin in a custom color. A little later a stripped ‘53 Les Paul came in. I did a good all-gold refin on it and sold it for a good profit.
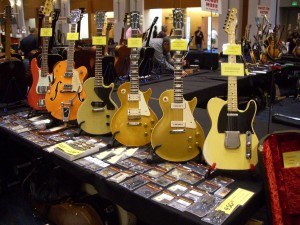
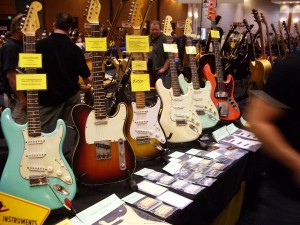
By the time we closed our music store in 2001, I had done a fair number of refins on old Les Pauls , Teles and Strats. A few of these had made their way to some of the major vintage stores in the States and my work started to gain a small following. I continued working out of my house, mostly for local people. Then in the spring of 2006 I went down to visit my good friend Rick King who owns Guitar Maniacs in Tacoma. I showed Rick a Strat I had painted and he asked if I would be willing to work on a couple of stripped maple neck Teles he had in his store. I did route repairs on them and aged blonde paint jobs. Having those restored guitars hanging in his store was great advertising for my business…the next time I went down there was about half a dozen guys waiting for me with old brown or tweed cases. I would go down to Tacoma every 3 months or so and bring back a few guitars to restore, returning them on my next trip down.
In 2007 I launched my website and displayed my refins at both the Dallas and Arlington vintage shows. Things went kind of nuts and since that time and we have been very busy.
300guitars: What type of restoration services do you offer?
Gord Miller: I am very fortunate to be able to work with my “unofficial” partner, Blair who is a friend and high end finish carpenter by day and a total Les Paul nut in his spare time. In my humble opinion his work is as good as anything I have ever seen…and a lot of my customers agree with me. He does the vast majority of the woodwork type repairs we get …between us we are able to tackle pretty much anything that gets thrown at us.
In the first 18 months or so of doing this, it was mostly Fenders that were showing up. We were doing route repairs and fret jobs and aged paint jobs for the most part.
After Dallas the pendulum swung the other way and now we are working mostly on Gibsons…which can require a much broader range of restoration services. I think the Gibson to Fender ratio changed because I displayed both a burst and a goldtop we had built from scratch at Dallas and Arlington and these were very well recieved. Both guitars can be viewed on my website at www.gmvintagerestorations.com .
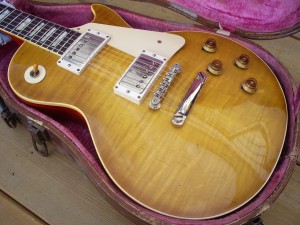
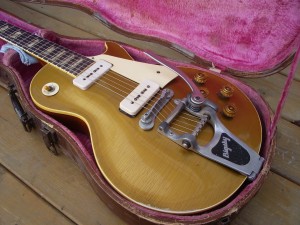
By this point in time we have tackled most everything…including binding repairs, retopping Les Pauls, new holly headstock overlays, silkscreening, neck resets, inlay work, conversions from 52 to 59 Les Paul specs, converting P-90 guitars to humbuckers , converting poorly done humbucking routes back to factory correct P90 routes, headstock repairs, refrets as well as building complete period correct necks for old Gibson’s that need them.
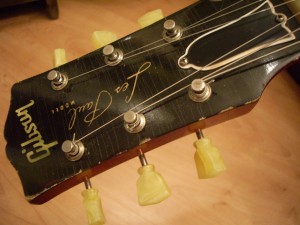
Of course aged finishes are my primary area of specialty. I do all finishes including Gibson Les Paul bursts, LP junior bursts, TV finish, goldtops and Gibson custom colors. For Fenders I do blonde, butterscotch, 2, 2 & 1/2 and 3 tone sunbursts, all custom colors and factory style sparkle finishes. Fender style finishes consist of all the correct “factory” steps….yellow stain, fullerplast, desert sand or off white primer, color coat, and finally amber and clear top coats. I do specialty finishes such as Gretsch orange as well. I also do electronics restorations for a lot of customers, finding and supplying original parts.
As time permits, I also do restoration of old cases and amplifiers but right now I am just trying to keep up with the guitars!
300guitars: What is the most difficult part of doing a restoration?
Gord Miller: At this point we have done most facets of the restoration process many, many times, so things are relatively stress-free. I would say my biggest challenge is probably doing partial refins on original finish guitars. This often happens on guitars where we have to do a route repair and blend into the existing original finish. Goldtops are generally the most challenging as the gold paint has real metallic pigment in it and it reflects light differently depending on which angle it is viewed from. I’ve also had to restore a couple 50s Strats that were stripped without taking the parts off, meaning that the original finish was under the pickguard area, vibrato cavity, etc. Putting a new finish on only part of a guitar and having it blend with an original 50 year old finish is a challenge for any painter. Removing overspray from necks can be harrowing work as well.
300guitars: When you are refinishing a guitar do you use old methods and original materials?
Gord Miller: When I first started painting, I knew that I wanted to use nitro lacquer because that’s what Gibson and Fender used in the glory years. When I went into the paint stores and told them what I was doing, they used to say “You don’t want nitro, it will shrink and crack as it gets older…you should use poly or lacquer with plasticizers.” I used to say “But I want it to crack.”…they thought I was nuts!
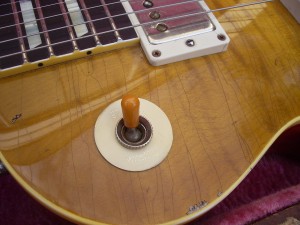
I also have the vast majority of original Fender custom colors in nitro lacquer…they were formulated with a computer by scanning original samples of custom color Fenders. They are all spot on.
For bursts I use aniline and powder dyes in nitro lacquer for the correct factory look. My goldtop finishes are made with genuine bronzing powder just like Gibson used in the fifties. For Gibson’s, I use paste pore fillers tinted by the appropriate stain, depending on what finish I am doing. The only departure I have done from original 50s methods is how I pore fill ash Fender bodies. I understand that Fender used a very fine grained sand in a naptha based solution. I never had much success with this, so I use a neutral colored paste pore filler. Once the blonde is on you can’t tell any difference.
For customers who want an ultra-authentic aged paintjob, I have a special aging box with a rotisserie in it and high intensity UV lights. After about 10 hours in there the lacquer shrinks, sinks, and even blacklights like a real 50 year old finish.
300guitars: Were all the major manufacturers during the 1950’s and 1960’s using the same finishing materials?
Gord Miller: Most manufacturers were using nitro lacquer during the 50s and 60s. It was cheap and it dried quickly, making it ideal for large scale manufacturing. Having said that, it is important to note that a good percentage of Fender’s custom colors were not nitro…but were actually acrylic lacquer.
Fender used paint by the Dupont company. Legend says that Leo sent George Fullerton down to a local autobody shop to pick out some colors for their guitars. The colors Fullerton picked were already pre-formulated colors for the automotive industry. Many of these colors were mixed using Dupont Duco lacquer, which is nitrocellulose lacquer. Others were formulated using Dupont Lucite acrylic lacquer, which had plasticizers in it. General rule of thumb….most of the pastel colors (Sonic Blue, Surf Green, Fiesta Red, Shell Pink etc) were Duco brand, while the metallics (Lake Placid Blue, Candy Apple Red, Burgundy Mist, Shoreline Gold etc) were Lucite acrylic brand. Clear top coat had to be put over the metallic colors to prevent oxidation….this clearcoat would have been nitro as it was the least expensive lacquer, and we all know Leo was a frugal man!
One other difference between Fender and Gibson in the 50s was the pore filler they used. In the early days, Fender used a pore filler that they made themselves on their ash bodies consisting of fine grain sand in a naptha solution. They must have added some other binders in the mix as well, if you just add sand to naptha, the naptha evaporates and the sand becomes granular again. Gibson used paste pore fillers similar to those furniture makers use. The paste pore fillers come already pre-tinted for finishes like the walnut backs of LP juniors, or you can add your own dyes to custom make colored fillers. This is what Gibson did for the backs of the cherry sunburst Les Pauls, which have a very distinctive look.
If you have ever tried to paint over a red mark on a wall, you know that red “bleeds” and it is very hard to cover it properly. The same thing happens on the back of a burst….as the clear lacquer is put over top of the red pore filler, the red pigment bleeds into the clear lacquer. This effect becomes more prominent as the color fades over time, creating a very cool look.
300guitars: I am particularly fond of the early Fender blonde finishes. Is this a difficult finish to replicate? What was Fender’s finishing schedule like for this finish and how does it compare to your schedule?
Gord Miller: The blonde (or butterscotch ) finish Leo used on his first guitars was actually a popular finish on furniture in the early 50s. Legend has it that Leo made ten pine bodied “broadcaster” prototypes and had five finished in blonde and five finished in black. He then gave one blonde and one black guitar to each of his five salesmen with instructions to visit music stores and see which color was more popular. History shows us that blonde was the popular choice.
I had the good fortune to be able to examine one of these five original blonde prototypes in the Los Angeles area in 2007. The owner was considering having the guitar restored because the finish was so “rustic” looking. There were a lot of sanding marks and the paint looked as if it had been applied with a brush. Considering that this guitar was a quickly made prototype never intended to be sold, it is possible that the finish was original. Wisely the decision was made to leave it be (Remember the A&R man who turned down the Beatles because “guitar groups were on the way out”?…I didn’t want to be his equivalent in the vintage guitar industry!)
Another advantage of the blonde finish is that it is quite quick and easy to apply. Records show that the Tele style guitar was successful very early on and that the Fender plant was hopelessly backordered in the beginning. Even as early as 1952-53 Fender was producing hundreds of guitars per year as their dealership network grew. In Richard Smith’s great book “Fender-The Sound That Shook the World”, there are a lot of great factory photos from the early fifties. In one of these photos you can see a pile of Tele style bodies stacked almost to the roof…over 80 bodies in all. Fender’s factory was small, so he had to get them finished and get them out (I know how that feels!).
The naptha pore filler Fender used dried very quickly. You wiped it on, squeegeed it off and did a final sanding an hour or so later. The guitars could then be painted pretty much right away. I have seen pictures of Fender employees painting early Strats and Teles outside between the buildings…things happened pretty fast! Lacquer can also be final sanded and buffed fairly quickly. I think Fender’s turnaround time in the early 50s was probably under a month from raw wood to finished product, barring backorders.
Fender blonde basically consists of white and amber pigments added to clear lacquer. The trick is to add the proper concentration of pigment so that you get the required transparency with 2 or 3 coats of paint. I’m sure I do my blonde finishes very similar to how Fender did them 60 years ago. The only differences are that I use a neutral colored paste pore filler as opposed to naptha and I am generally aging my blonde finishes.
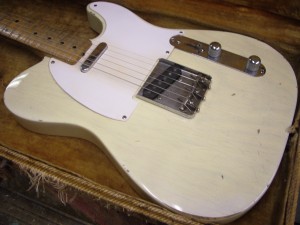
300guitars: Why do some of the early blonde guitars up until about 1955 look more amber and have a nice warm, aged appearance and post 1955 guitars look more pale by comparison?
Gord Miller: Everybody knows that Fender’s early blonde finish was darker than what they applied after about 1955.We now call the earlier finish Butterscotch to differentiate it from the lighter finish. Most of the original Broadcasters, Nocasters and very early Teles I have seen had a very transparent finish. Very little of the grain is obscured and some almost look like they were stained amber as opposed to a translucent finish. There are always exceptions. I have restored Teles from 1952 and 1953 that had really ugly bodies where the two halves didn’t match in color and there were mineral streaks etc in the wood. A finisher always has to find a happy medium where the wood’s flaws are covered as much as possible but the beauty of the ash grain still shows through.
This is just my theory, but I think as things really got rolling at Fender, it must of been harder for them to find a plentiful supply of clear ash for Tele bodies. From what I have seen, the lighter blonde finishes Fender used from 1955 onwards are generally more opaque. This means that flaws in the wood could be more easily disguised in less time.
Why Leo changed from butterscotch to a lighter shade is a bit of a mystery. Perhaps his dealers told him a lighter colored guitar would be better received, along with a white pickguard. Gibson came up with the TV finish around this time….another popular furniture type finish that purportedly showed up well on the then new television sets. Maybe Leo was thinking along the same lines…or maybe he was just tired of butterscotch !
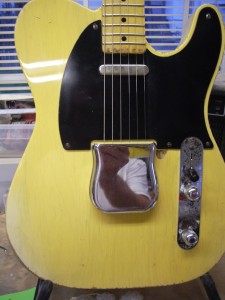
300guitars: What did the original blonde color look like when it came off the assembly line?
Gord Miller: The very clean original early Teles I have seen had a color that I would describe as a light yellowy orange with brown overtones. When they were new there actually wasn’t much contrast in shade between the neck and the body…maybe that’s why Leo opted for a dark pickguard. I would think that they all looked fairly similar when they left the factory….some have ambered up much more over time depending on the environment they were used in and the amount of clear coat on top of the color coats.
Some ash (generally swamp ash) has very deep pores and it can be hard for the filler to 100% level the top of the guitar. In cases like this more clear topcoat is applied, which is then sanded level. We all know that clear lacquer ambers with age…more clear lacquer means a darker finish 50 years down the road.
300guitars: Are original materials available for when you have to restore a custom color type of finish or do you have to have some custom made? Or do you mix your own?
Gord Miller: The tint bases for nitrocellulose lacquer were phased out about ten years ago and no longer exist. This was done because lacquer is not an “environmentally friendly” product compared to more modern finishes. Unfortunately for us guitar homos, nothing sounds or feels as good as good old nitro.
For the first couple of years, all that was available to me in terms of custom colored lacquer were premixed spray cans I had shipped up from the States. These were hard to spray uniformly and the colors tended to be off when compared to original samples.
I am fortunate being up here in Canada as it is still easy to find clear nitro lacquer if you know where to look. One day I was in an autobody supply shop visiting a friend when I saw him holding something that looked like a timing gun up against a damaged car. He explained that the gun analyzed the composition of the car’s paint and came up with a formula for the colorant needed to recreate that color. By having an original Fender paint chart analyzed by this device and figuring out how to chemically modify the colorants so they were compatible with lacquer I ended up with pretty much all the original custom colors in nitro lacquer. Many of my customers (including large vintage guitar stores) have told me the colors I use are spot on.
300guitars: Nitrocellulose lacquer was the manufacturer’s finish of choice years ago. Were all nitrocellulose lacquers the same and how do they compare to the modern equivalents?
Gord Miller: The formulation for nitrocellulose lacquer remained unchanged for most of the 20th century. It was the common finish for most industries (including the automotive industry) until the mid 60s. Around that time some car manufacturers began using enamels which were more chip resistant and aged better than lacquer. In the guitar industry, Fender (now owned by CBS at the time) changed over to the relatively new polyuretnane paints. This finish was much less labor intensive, but was akin to dipping the guitar body in plastic. Gibson stuck with nitro lacquer for the time being.
Time marched on, advances continued to be made in paint technology and nitro lacquer came to be seen as an old fashioned product. Most modern lacquers have additives in them to make them more environmentally friendly, easier to apply or more durable. Remember that most people don’t want their finish to shrink and check! I had to talk to a lot of knowledgeable people in the paint industry before I was steered to pure nitro lacquer. It’s just not that popular any more for most applications. It has a high VOC rating, meaning a lot of what you spray ends up in the air and on the floor as opposed to on the guitar body. Nowadays waterborne lacquers are much more common…easier to spray and relatively more healthy….just don’t refinish MY guitar in them.
300guitars: Can using too much lacquer (too many coats) affect the sound and dynamics of a guitar? What is the typical finish thickness for one of your restorations?
Gord Miller: Personally I would rather have 20 coats of lacquer than 5 coats of polyurethane. Lacquer will dry out and become thinner and more resonant with time…plastic will become …old plastic!
The thickness of a finish often depends on the color of a guitar as well. Let’s compare a 1955 Ttele and a 1963 Candy Apple Red Strat both painted at the Fender factory. The Tele got a coat of pore filler, maybe a sealer coat which was then sanded, 2 or 3 coats of color, and depending on the guitar 2 or 3 coats of clear which was then sanded. The 1963 CAR Strat was stained yellow and shot with 2 or 3 coats of sanding sealer. Then it recieved 2 or 3 coats of desert sand or off white primer. Then it received 2 or 3 coats of silver, which was the basecoat for Candy Apple Red. Then it received sufficient coats of transparent red to end up with the right shade (usually about 6-8 coats) THEN it had to be clear coated to prevent oxidation of the metallic pigments.
Obviously the finish on the CAR Strat is a lot thicker than the finish on the blonde Tele. Does it sound worse than the Tele???…personally I think they both sound great!
Gibson’s Les Paul goldtop finish is also generally quite thick…we’ve all seen old goldtops where the thick original paint actually starts coming off in chips. The lacquer checking on goldtops is generally deep enough so that you can easily feel it…the bronzing powder used in this finish adds quite a bit of thickness to the paint film. I’ve also noticed that Gibson tended to put their custom color finishes on thicker than Fender did. Original custom colored Firebirds and SGs I have examined had a paint thickness similar to the goldtop Les Pauls… and all these guitars sound great.
To answer your last question, I make the thickness of my finishes as close as possible to the thickness of the original finishes Fender and Gibson sprayed.
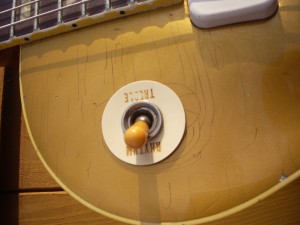
300guitars: So, you have just refinished a vintage guitar and it looks like brand new from its first day of manufacture. The customer you are doing the work for wants the guitar aged. What is that process like?
Gord Miller: The aging process actually starts during the painting. If you have ever taken apart an original finish Fender, you have noticed that the paint is a lighter color where it is not exposed. After the body is painted the “new” color I attach templates of the pickguard, control plates, vibrato plates, etc. The guitar then gets 2 or 3 more coats of ambered lacquer, depending on the desired effect. This process is especially effective on lighter colors like Olympic White and Sonic Blue.
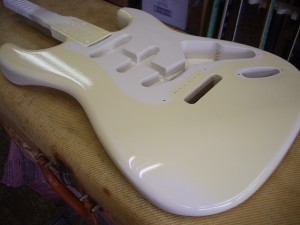
After the amber lacquer is dry, I take the templates off and wear through to the ” virgin ” color in the appropriate places…the forearm area, strap area, side of the guitar that makes contact with the case etc. Then the guitar gets it’s final coats of clear lacquer.
A couple of weeks later the body is sanded with very fine wet and dry sandpaper and buffed to a high gloss. The next step is the lacquer checking. I can’t talk too much about how I do this as I hope to patent the procedure, but I can say that I have figured out a way to duplicate original lacquer checking patterns onto my new finishes with 100% consistent results. I have a library of appropriate patterns for different guitars…Teles, Strats, J basses, Goldtops, ‘bursts, SGs, Juniors, ES 335s….you name it. I think my lacquer checking is the main reason GM Vintage has gotten as successful as it has.
After the checking is complete the exposed areas of the body are dulled slightly to attain a realistic patina. The areas under the pickguard, control plate etc are left shiney as they would be on an original finish guitar.
At this point the guitar starts getting banged up. My belief is that a lot of people go overboard when it comes to aging guitars. I like to do my guitars to about 8/10 condition. In other words, if it was an original finish guitar sitting in a vintage shop, they would describe it’s condition as 8 out of 10. To me that means lacquer checking, some judiciously applied nicks and dings, some wear marks where the side of the guitar comes in contact with the case, and perhaps a bit of worming or belt buckle rash.
I like to involve the customer in the aging process and make sure we are on the same page. I want the customer to get back EXACTLY what they pictured in their mind when they sent their guitar away. Obviously the condition of the neck and hardware have to be taken into account also…it would be silly to do a lot of wear on a body and attach it to a really clean neck!
For customers that want an ultra authentic restoration, the last step is about 10 hours in the aging box. This process shrinks the lacquer at a much accelerated rate and makes it blacklight like an original finish.
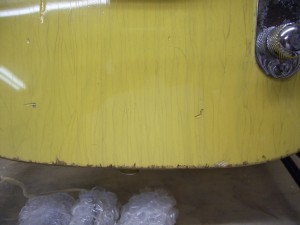
300guitars: I understand that you are the North Eastern distributor for Montreaux Guitar Parts. What does this company offer and how does that help your restorations?
Gord Miller: I actually have exclusive North American distributorship for Montreux Guitar parts as well as the majority of the products in the Vintage Clone line. I feel really fortunate to have these two lines, as they dovetail so nicely with my restoration practice. I am able to offer a great alternative to my customers who are interested in having their guitars look original, but don’t want to take out a second mortgage!
My Japanese friend Yuichiro Shirakuma started Vintage Clone about 5 years ago when he realized the need for highly accurate aged and new condition reproduction parts for old Les Pauls. A little over a year ago he sold the Vintage Clone company and started Montreux with the aim of raising the bar even higher in terms of authenticity.
The original line consisted mostly of ‘burst parts. They were made from molds of real 50s Gibson parts using the same color plastic and same manufacturing processes that Gibson did in the 50s.We originally had M69 rings, jackplates, selector switch rings, bonnet knobs and a few other ‘burst bits. These parts made their North American debut at the 2007 Dallas show and were very popular with dealers and with people who want to make their Les Paul Historic’s more authentic.
Over the past year many new parts have been added to the Montreux line, including properly beveled multi-ply guards for 2 and 3 pickup Les Paul Customs, P-90 Les Paul Customs, and 1959-1962 ES 335s. We also have aged PAF pickup covers, bonnet and reflector knobs in gold and black, 3 ply jackplates, authentic backplate sets for goldtops and ‘bursts, original style screws, ABR1 bridges, and single line Kluson Deluxe tuners for 50s and 60s Gibsons.
Montreux has also expanded into Fender style parts. We have ultra authentic short skirt knobs, pickup covers and football switch tips for 54 Strats available in new and aged versions. We have aged pickguards for 56, 62, 64, 65 and 68 Strats, along with all the appropriate plastic for those years. We have aged 62 style Strat knobs made out of the correct nylon material and aged bakelite guards for early Telecasters.
We are planning to introduce some exciting products in the first half of 2009. We will have the first commercially available M69 humbucking mounting rings made from the original chalky looking, rubbery plastic with all the correct tooling marks. In addition, we are developing authentic P-90 soapbar and dogear covers in the correct color, height and thickness plastics with all the correct tooling marks. And we also have plans to do ultra authentic lightweight stop and wrap tailpieces this coming year as well.
My association with Montreux has been very satisfying and we are in the process of expanding our dealer network both in the United States and Canada. All the products can be viewed on my website at www.gmvintagerestorations.com. Anyone interested in becoming a dealer is welcome to contact me through the website.
300guitars: Do you also age your own parts for some restorations?
Gord Miller: I age some of the Montreux parts myself. These would include pickguards and M69 rings. For the Fender style guitars I make for people, I age most of my own metal parts here as well. I also age Gibson style parts like tailpieces, bridges and tuners here, including ambering the buttons.
300guitars: If you can’t find a particular component for a guitar do you have to make it yourself?
Gord Miller: I’m usually not called on to fabricate parts. Quite often I am asked to help get a guitar back to 100% original. I have a small stock of vintage pots, plastic, pickups, tuners etc here. If I don’t have the needed part, I have connections with 3 of the major vintage parts dealers in North America. I can supply pretty much anything if the customer has deep enough pockets! In many cases, when the customer sees how close the Montreux parts look to original, they go that route.
300guitars: What are your favorite finishes to shoot?
Gord Miller: That depends on my mood! It is always satisfying nailing the correct ‘burst on a Les Paul, but it can be pretty stressful as well. I’m sure we all know Les Paul guys can be pretty picky (I am the pot calling the kettle black!) …. a Fender guy will say ” I want a sunburst on my Strat”…a Les Paul guy will go ” I want a cross between page 97 in the Toneman book and page 122 in Beauty of the burst…except in the cutaway…that should look like page 102 in Robb Lawrence’s Les Paul book.” I’ve actually had instructions like this!
I’ve done almost 300 guitars in the last 2 years, so I have done most finishes many times. I like spraying a lot of the Fender custom colors. Some of my favourites would be Foam Green, Inca Silver, Daphne and Sonic Blue …these all look killer with the aged topcoat. I own a 1960 Strat I did in aged Foam Green with correct Desert Sand primer. I think it looks amazing with the original green guard. I also recently started doing some of the custom early 60s sparkle finishes. I have a friend who has an original early 60s Strat done in red sparkle and I decided to do this finish on my 64 Strat. It turned out really nice. My present favourite is a 1956 Strat I am just finishing done in aged Desert Sand…I can’t take my eyes off it!
I like doing Gibson goldtop and TV finishes, and I’ve redone a few SG customs in aged Polaris White…which I think is a really classy finish. And let’s not forget blonde and butterscotch… an aged blonde Tele is a thing of beauty!
I guess I’m really fortunate that I have such a variety of guitars to work on. I’m sure if all I did was white Strats, I’d be going crazy by now.
300guitars: What are your plans for the future of your business? Is there anything new on the horizon?
Gord Miller: I hope to greatly expand the number of Montreux dealers in North America and help this company grow and become widely known and respected in the industry. We have a great partnership and I’m excited because they will start to distribute my aged Strat and Tele style guitars in Japan and throughout Asia this coming year. I’m looking forward to finally meeting my friend Yuichiro face to face next summer when he comes to Canada, and I plan to visit him in Japan before the year’s end. I would like to display my work again at the 2009 Arlington vintage guitar show if my schedule permits.
I would also like to expand my shop this coming year. It’s pretty small and with almost 50 customer guitars here, space is at a premium. We are currently finishing between 10 and 15 guitars a month, depending on how involved the restorations are. It’s just me and my assistant Dan (aka: the naughty guitar stripper!) and I kind of like it that way. I’ve had lots of employees in the past and that situation has a whole different set of challenges. My main focus is keeping the quality of our work high and keeping my customers happy. I just plan to keep enjoying myself…because I know I’m a lucky guy!
300guitars: Thank you very much Gord for taking the time for this Spotlight interview. I wish you much success in the future!
Gord Miller: Thank you for your support…it’s been a pleasure.
Further Information: GM Vintage Restorations.